Christmas Wall Hanging Quilt Patterns: Size, Skill and What to Look For

A Christmas wall hanging is the quilt people actually finish. It is small enough to sew in a weekend, bold enough to be the first thing guests notice and light enough to store flat in a drawer for eleven months. If you have seen a dozen designs and cannot decide, the choices come down to four things: size, construction, difficulty and how the pattern is delivered.
Size: what fits your wall
Wall hangings fall into three practical sizes.
| Size | Typical finished dimensions | Where it goes |
|---|---|---|
| Mini | 9 x 14 in | A door, a shelf, a small gallery wall |
| Small | About 12 x 16 in | Hallway, kitchen, a mantel side |
| Statement | About 18 x 28 in | Over a console, a stairwell or a bare wall |
Cut a piece of paper to the finished size and tape it up for a day. If it looks right, you have your answer.
Construction: how it goes together
The look of a hanging depends on its construction. Three styles dominate.
Pieced. Triangles and strips sewn into a tree block. Neat, traditional, and demanding about seam accuracy.
Applique on a background. A tree appliqued to a rectangle, finished with straight binding. Calm and picture-like.
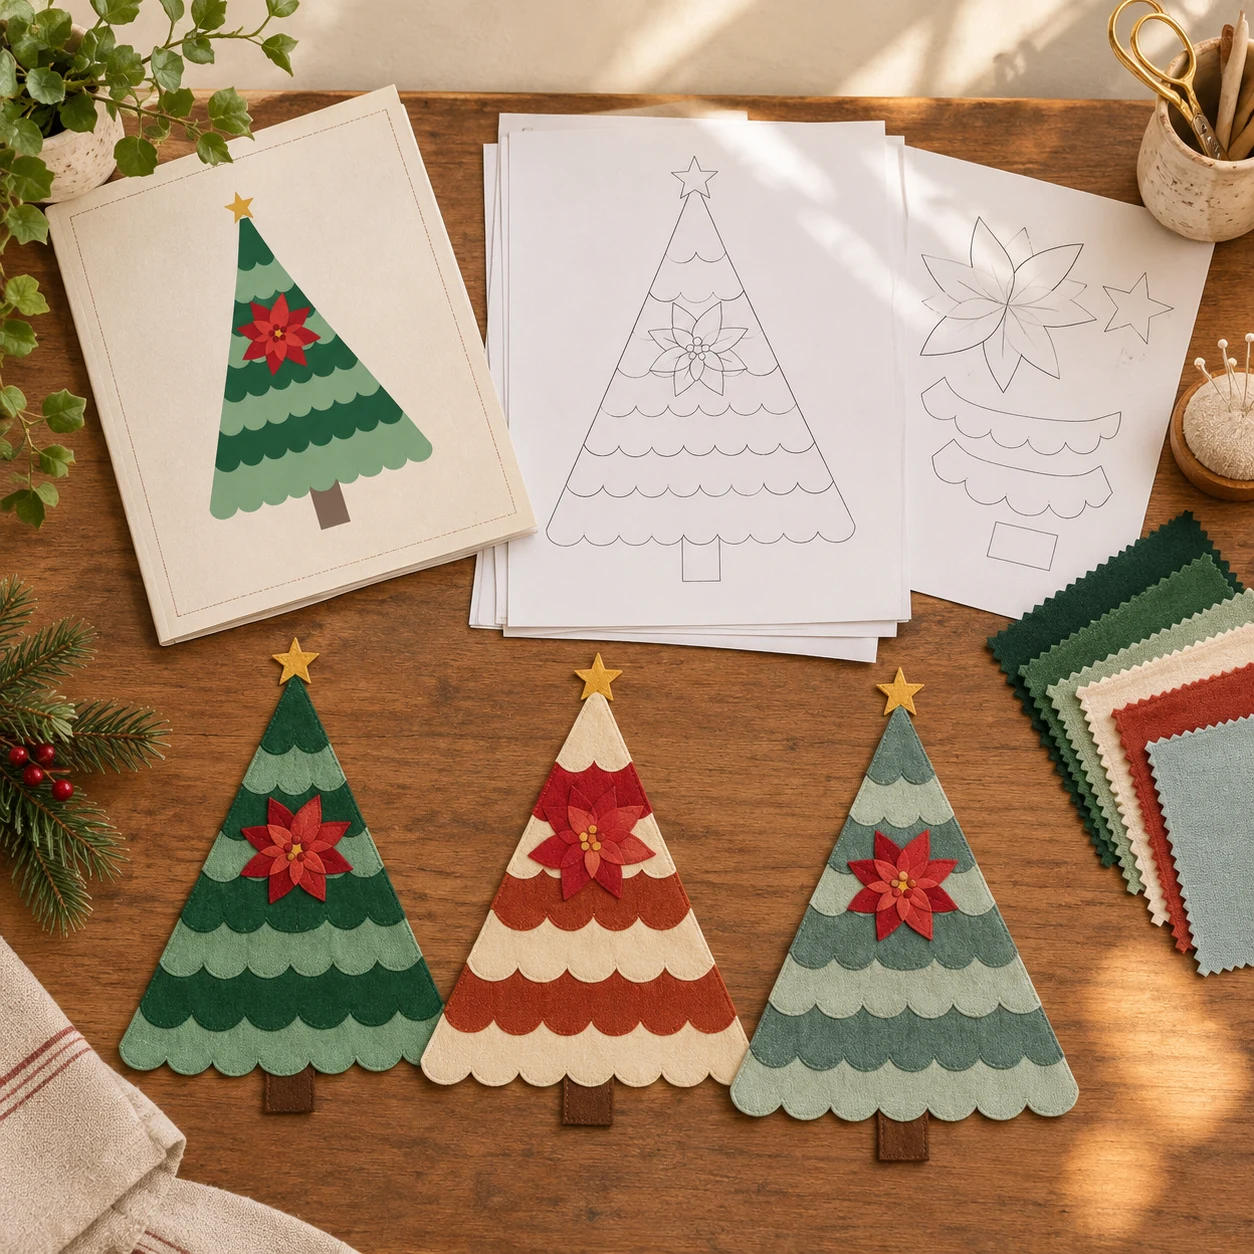
Layered tiers. Scalloped tiers stacked from wide to narrow, with the outline of the tree as the edge of the piece. The edges are stitched, not seamed, so there are no points to match.
The Christmas Tree Wall Hanging Pattern is a layered tree: 18 x 28 inches, eight tiers, a trunk, an optional star and a poinsettia centerpiece. It comes with a mini version at 9 x 14 inches too.
Difficulty: be honest about your hands
A quick self-check.
- First or second quilt? Choose layered or applique, with printable templates and numbered steps.
- Comfortable with a quarter-inch seam? A pieced hanging is a good next step.
- Dislike hand sewing? Use fusible or raw-edge applique, and machine edgestitching.
- Like handwork? Turned-edge applique and a hand-finished binding give a refined look.
The hardest part of a shaped tree is the binding. It follows scallops and stepped corners, so the pattern asks for bias strips: 2.5 inches wide, about 94 inches in all for the full-size tree. Try it on a scrap sandwich first.
Delivery: why a PDF with templates makes a difference
If you have ever tried to enlarge a small diagram on a copier, you know why full-size templates matter. A good PDF has:
- Pages sized for your paper. US Letter and A4 versions.
- Tiled sheets with registration marks so you tape the large shapes together.
- A 1-inch control square on every page, so you can confirm that the printer did not scale the file.
- An assembly map showing which pages go together.
- A cutting chart and materials list.
This pattern has an assembly map, 15 template pages for Letter or 16 for A4, and a page of small pieces for the trunk, star and flower.
Materials: what you buy
For the full-size tree:
- One dark fat quarter and one light fat quarter for the eight tiers.
- A fat eighth or scrap each for the trunk, the star and flower center, the leaves and the two reds of the petals.
- Backing and batting, 22 x 32 inches each.
- 2.5-inch bias binding, about 94 inches.
- Optional lightweight fusible web.
If you plan to use a stash, the grayscale trick helps: take a photo of your fabrics, switch it to black and white and check that the tiers have enough contrast.
Color: three starting points
- Classic Evergreen for a traditional look: deep green, sage and a red poinsettia.
- Cream and Rust Scrappy for a warmer, farmhouse feel.
- Frosted Spruce for a cool, modern tree with a white flower.
You can also work from your own palette. Our scrappy tree guide shows how to organize a basket of fabrics.
Finishing: quilting and hanging
Layered trees are quilted as you stitch them, so there is little extra quilting. Add texture along the petals and leaves. Then choose how to hang it. A sleeve is stitched to the back, 9 inches from the top and centered, before the binding. Loops of ribbon or fabric can be basted into the binding at the neck of the star.
Where to hang it and how it looks in the room
A tree hanging earns its place when it has breathing room. Give it a plain wall or the space above a console, keep it away from direct sun that fades fabric over the years, and leave a hand's width of empty wall on each side. A narrow tree like this one reads well in a hallway or beside a window, where the scalloped tiers catch the side light and the poinsettia becomes the focal point.
Many makers sew the full-size tree for the main wall and the mini for a door or a bookshelf, in the same colorway, so the two echo each other. Because both use the same design at different scales, the mini is also a low-risk way to rehearse the order of work: bottom tier first, trunk tucked under, star behind the top tier, flower last.
A realistic schedule
Printing and taping the template rows is an evening. Cutting the 36 pieces is another. The build, with the tiers laid on the batting and the scallops edgestitched, fits in a Saturday. Flower, binding and hanging sleeve fill Sunday. If you only have an hour here and there, break it up by stage: templates one day, tiers the next, flower the next. Each stage ends with something you can see, which keeps a project moving.
Checklist before you pick a pattern
- Does it state the finished size?
- Are templates full-size and tiled for your paper?
- Does it include backing, batting and binding in the materials?
- Do you understand the binding instructions?
- Does it say what is personal use and what is not?
If you can answer yes to all five, you have a pattern you can finish. Read how to make a quilted Christmas tree wall hanging for the whole build, or compare other tree quilt patterns.
This is a personal-use digital pattern. Instructions use schematic diagrams, not photographs, and sewing materials are not included.