Christmas Tree Applique Pattern: Templates and How to Stitch Them
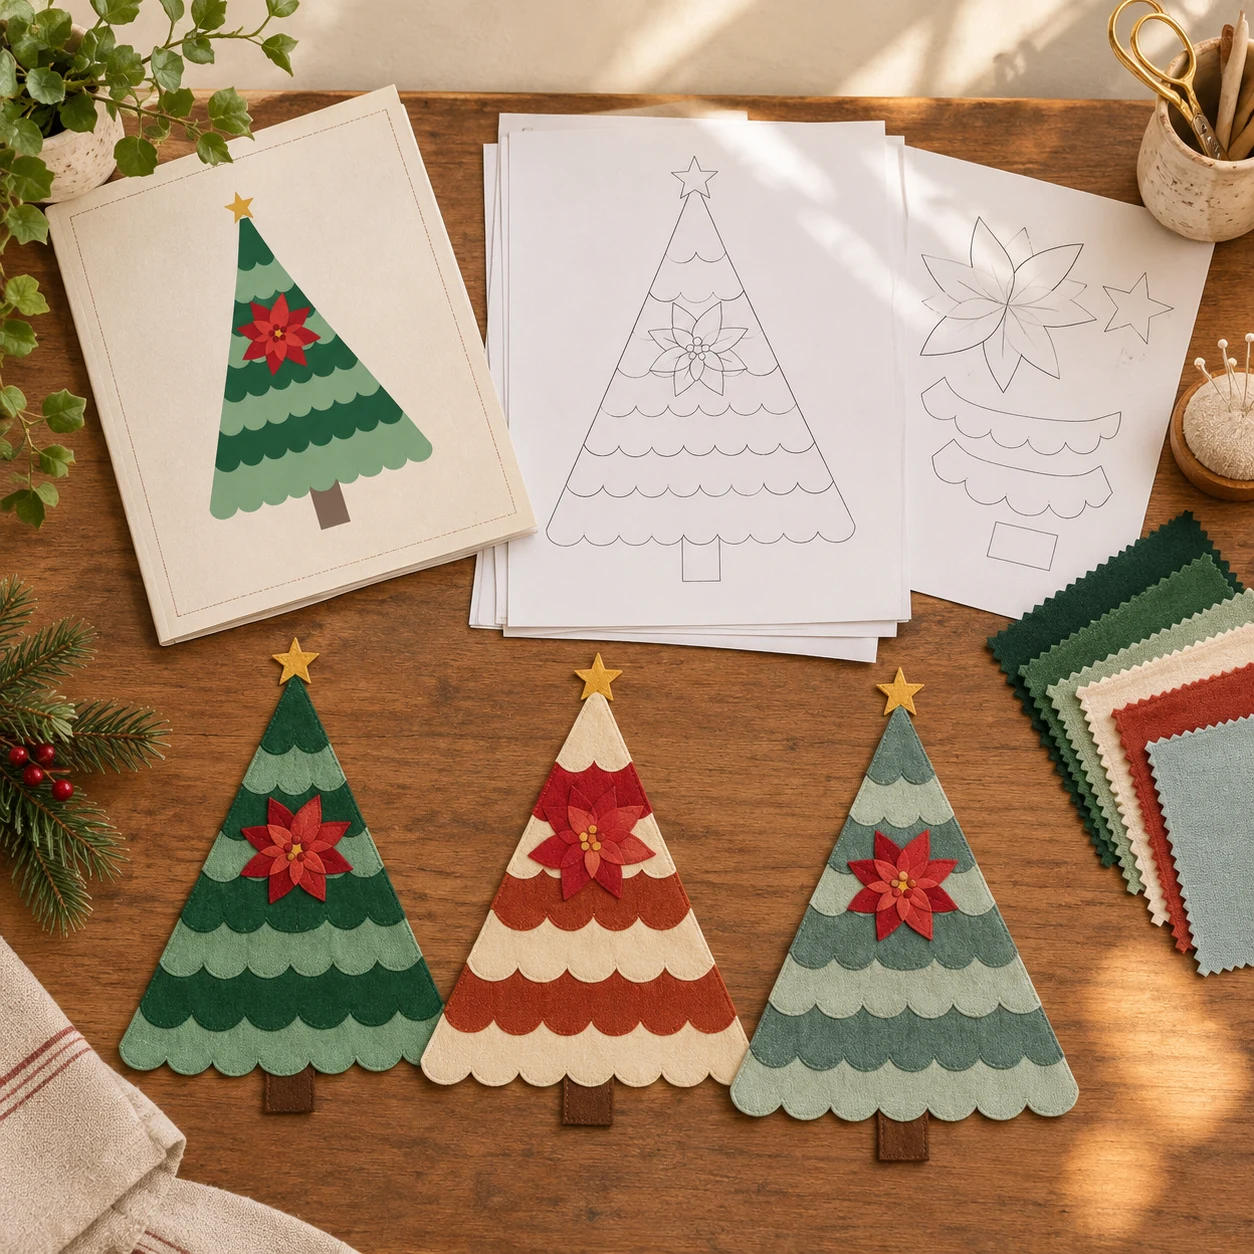
A good Christmas tree applique pattern gives you three things: shapes that print at the right size, a clear choice of how to finish the edges, and a build order that does not make you guess. The rest is thread, fabric and an evening.
Here is how to choose an applique method for a Christmas tree, set up your templates and test your stitching before you cut into the good fabric.
What "applique" means on a quilt
Applique attaches a fabric shape on top of a background instead of joining two edges in a seam. On a Christmas tree, that means scalloped tiers stitched over batting and backing, with a trunk, a star and a flower on top.
One search note: "tree applique" brings up embroidery designs and crochet as well. If you are after a fabric quilt, look for a pattern that mentions fabric, templates, batting and binding.
The three edge methods
All three can use the same design. They differ in how you cut and how you finish the edge.
Raw-edge
Cut on the dashed finished-edge line, with no seam allowance. Pin the shape and stitch 1/8 inch inside the edge with a straight stitch, or use a narrow zigzag over it. The raw edge softens and frays slightly in the wash, which gives a cozy, handmade look.
Choose it when you want speed and a relaxed finish, and the quilt is for display.
Turned-edge
Cut on the solid line, which includes the seam allowance. Clip the curves, press the allowance under over a freezer paper copy of the dashed line, then slip-stitch or edgestitch. You get clean, flat edges.
Choose it when you enjoy hand sewing and want a polished look.
Fusible
Trace the dashed line on the paper side of lightweight fusible web, face down, so the shape is reversed. Iron the web to the wrong side of the fabric, cut on the line, peel the paper and fuse. Finish with a satin or blanket stitch.
Choose it when you want the shapes to stay put and your machine handles dense stitching well.
| Raw-edge | Turned-edge | Fusible | |
|---|---|---|---|
| Cut line | Dashed | Solid | Dashed, traced face down |
| Seam allowance | None | Yes | None |
| Finish | Straight or narrow zigzag | Slip stitch or edgestitch | Satin or blanket stitch |
| Look | Soft, slightly frayed | Clean and flat | Defined edge |
| Speed | Fast | Slow | Fast |
For a first project, pick one method and use it for every piece. Mixing is possible later.
Print the templates accurately
Templates are only useful if they are the right size. Print the pages at Actual Size or 100 percent, never "Fit to page" or "Shrink oversized pages". Each page in the Christmas Tree Wall Hanging Pattern carries a 1-inch control square in the bottom-left corner. Measure it before you cut.
For a tiled tier, each tier has its own row of pages (A, B, C and so on), with triangles and lines to match. Trim the left margin on the dashed border, lay each page over its neighbor, match the triangles and tape. Never join one tier's row to another.
Cut sheet for the tree
The tree has eight scalloped tiers, from a 3-inch top tier to a 17-inch bottom tier. Together with the trunk, star and flower, the full-size pattern has 15 template shapes and produces 36 cut pieces. The mini finishes at 9 x 14 inches, with tiers from 1.5 to 8.5 inches.
Seam allowances for turned-edge are 1/4 inch on tiers and the trunk, and 3/16 inch on small pieces. The mini uses 3/16 and 1/8 inch.
Test on scraps before you commit
This takes ten minutes and saves a lot of frustration.
- Cut a test scallop from the same fabric as your tier, with the same method.
- Layer it on a scrap of batting and backing.
- Stitch it with your chosen thread and stitch length.
- Check the edge. Is it flat? Does the stitch pull? Is the thread visible?
- Wash and dry a swatch if the hanging will ever be cleaned.
Adjust stitch length and tension on the scrap, not on the tree. For fusible, test whether your web is easy to peel and whether the fabric feels stiff after fusing.
Order of work on the tree
Build from the trunk and bottom tier upward. Place the trunk on the centerline, tuck it under the lowest tier and stitch only the straight top edge of each tier at first. When the whole tree is in place, stitch the scalloped hems. Add the star behind the top tier before you stitch that tier. The poinsettia comes last.
Stitching the scallops: pivot with the needle down at each valley. By hand, use a blanket stitch or a slip stitch about 1/8 inch apart. See the full step list for the entire build, including binding.
Working with small flower pieces
The poinsettia has 26 pieces: six leaves, eight outer petals, six inner petals, a center and five berries. They are small, so check your cutting accuracy. Label reversed pieces. A fusible approach helps here because each petal stays in place, but raw-edge works too if you pin carefully.
For ideas on color, see poinsettia applique quilt pattern.
Thread and needle choices
- Matching thread hides stitches and gives a tailored look.
- Slightly darker thread adds a subtle outline without being obvious.
- Contrasting thread, like gold on green, makes the stitching part of the design.
- A fine needle (a 70/10 or 80/12 on machine) reduces holes in fusible and keeps stitches neat.
What you get with the pattern
12 pages of instructions with diagrams, a template assembly map, tiled pages for US Letter or A4, a mini size, a cutting chart, a materials list, three colorways and the Start Here guide with the Holiday Quilt Studio planner.
If you want a practical first applique project that looks impressive on a wall, the next step is to compare it with other Christmas applique patterns or read the beginner guide.
This pattern is for personal use. Sewing materials are not included, and instructions are schematic diagrams rather than photographs.