Brick Stitch Graph Paper: Plan Your Own Beaded Designs
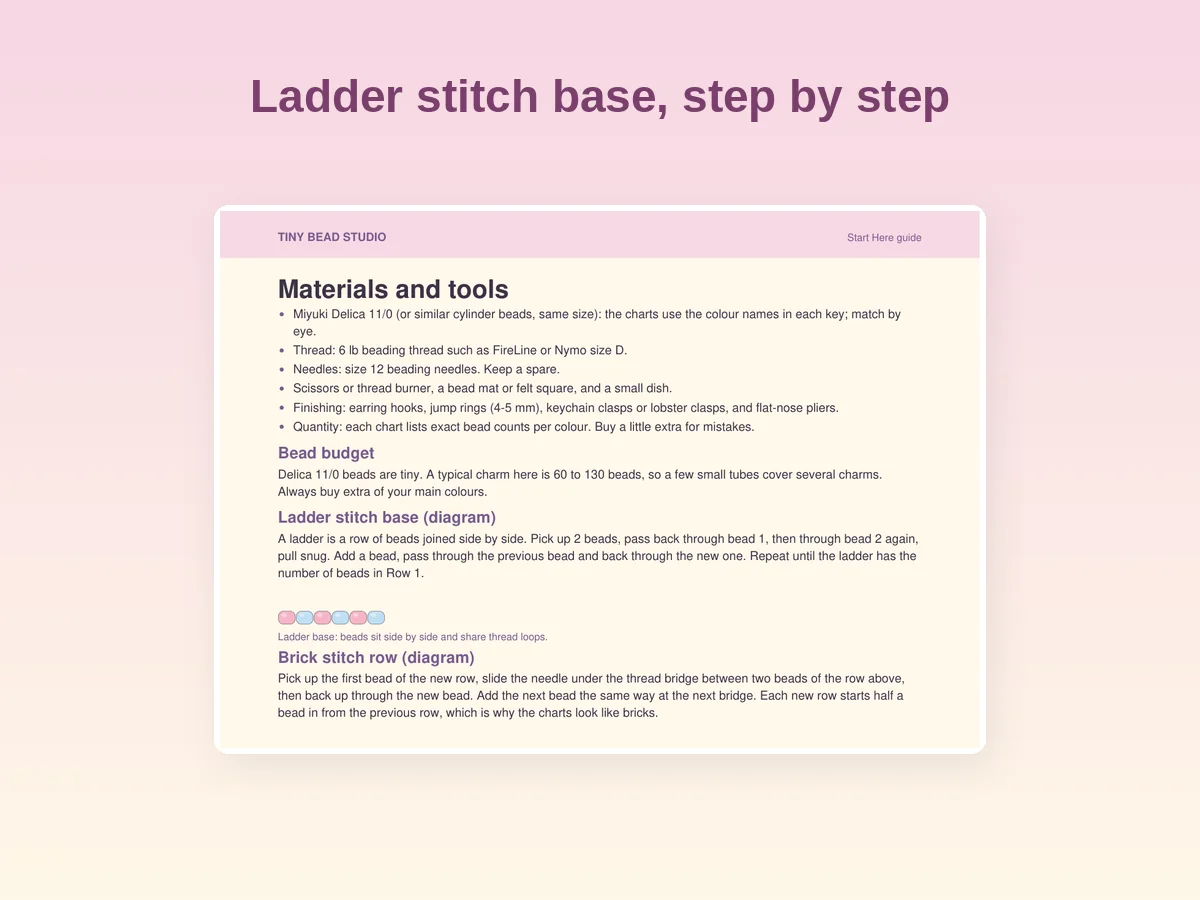
Brick stitch graph paper is a grid of staggered beads, not squares, so your drawing matches what the beads will look like on the thread. If you design on ordinary square paper, a round fish comes out stretched, and the row counts do not match the real piece. A brick grid fixes both.
This guide shows how brick grids work, how to design a small charm on one, and how to use the colour planning sheet in Tiny Bead Studio · Beaded Charm Starter Pack to try palettes before you buy beads.
Why brick grids are staggered
In brick stitch each bead of a new row sits between two beads of the row below. Your chart must show the same offset, or the shape will be wrong. Square paper stacks beads in columns, which would be right for peyote-style squares or loom work, but not for bricks.
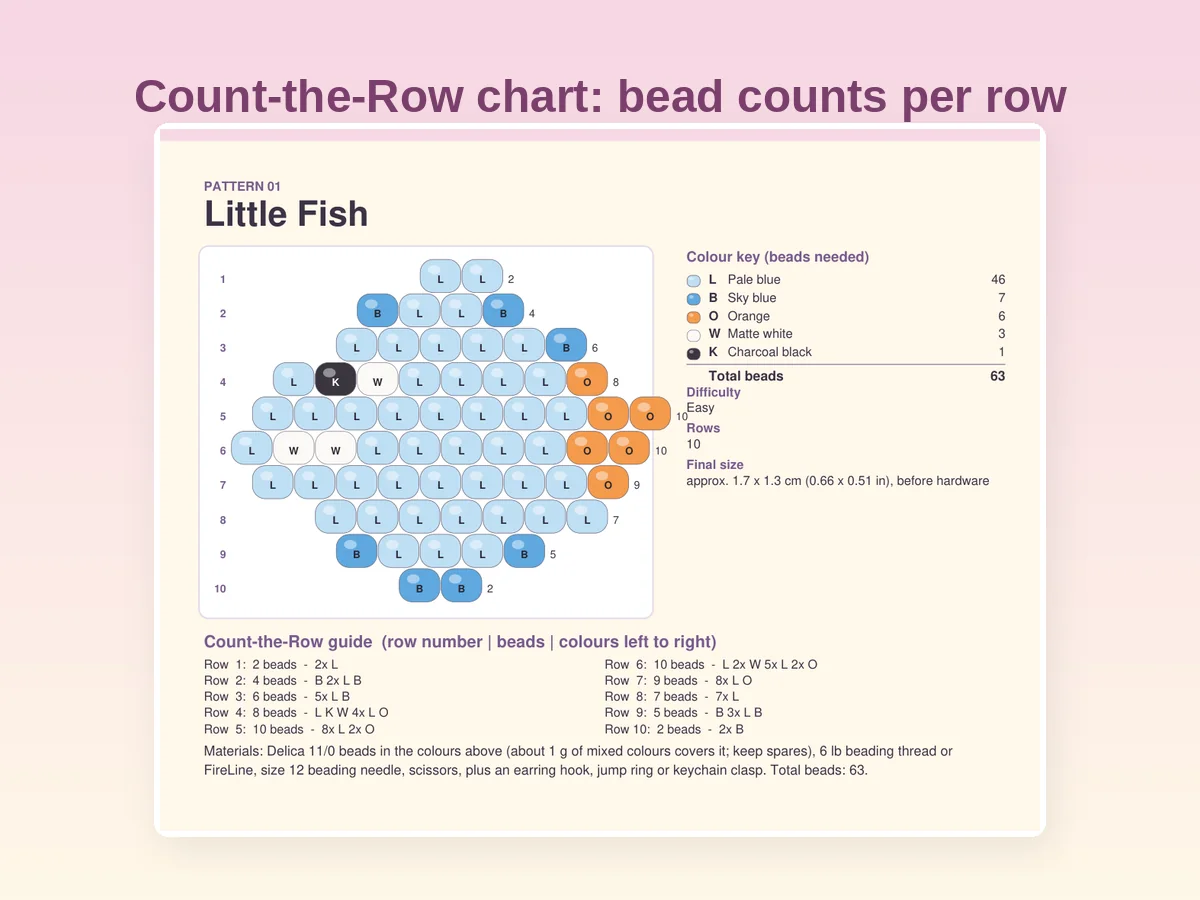
The charts in the pack show the difference. In the Little Fish, row 1 has 2 beads, row 2 has 4, row 3 has 6: each row adds a bead on each side, and each bead is centred on the gap below. That is the staggered look.
Reading the grid
Look at any chart in the pack:
- Rows are numbered on the left.
- Each bead is a rounded rectangle with a letter for its colour.
- The number of beads in a row is written at the end of the row, so on the Little Fish row 5 ends in 10, row 7 in 9, row 8 in 7.
- A small dot or blank marks a gap, as in the frog legs ("DD..DD").
This is the vocabulary you need to design.
Designing your first charm: five steps
- Pick a silhouette. A heart, a cloud, a mushroom. Choose a shape that reads in a small area.
- Decide the number of rows. Eight to twelve is a good range. The charts in the pack run from 10 to 14.
- Set the width of each row. Start at 2 beads, grow by 2 each row until the widest part (no more than 10), then shrink. This is how the Little Fish goes 2, 4, 6, 8, 10, 10, 9, 7, 5, 2.
- Add colour. Fill the body with the main colour, then place details: a dark bead for an eye, a pink one for a cheek.
- Count. Write the number of beads per row and the total per colour. This is your Count-the-Row guide and colour key.
If the total is far above 90 beads, the charm will take longer and weigh more. Reduce a row or two.
Details that carry the design
At this scale each bead is a pixel, so the effect comes from contrast:
- Eyes: one dark bead, or a white bead beside a dark one, as in the frog (W K at the top row).
- Cheeks: a pink bead on each side of the face (the ghost, the octopus, the frog).
- Shading: a darker colour along the bottom row, like the deep green on the frog's belly.
- Pattern: stripes (the bee), seeds (the strawberry), a band (the onigiri's nori).
Learn from the worked charts. Each is a small lesson in how many beads it takes to say "face".
Using the colour planning sheet
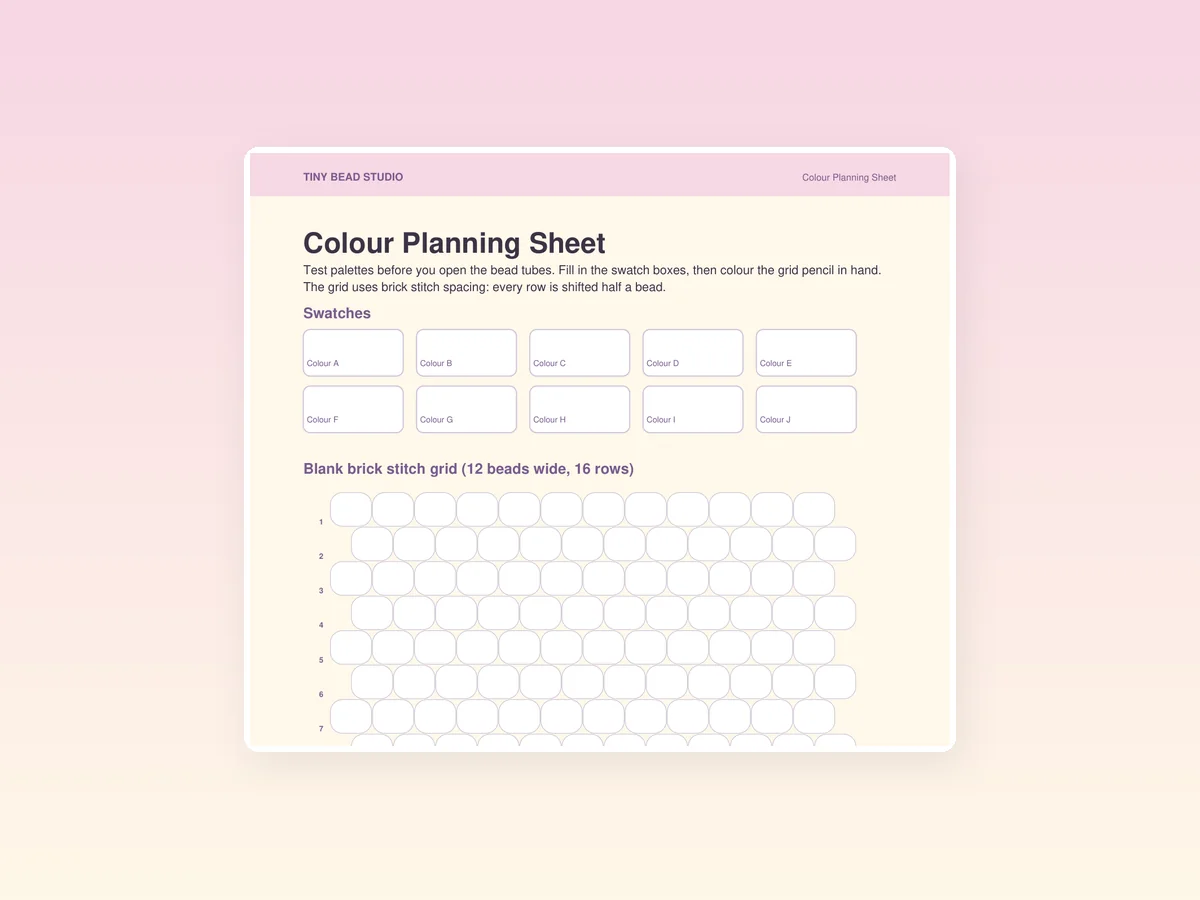
The pack includes a colour planning sheet with blank brick stitch grids. Use it in three ways:
- Recolour an existing chart. Draw the fish silhouette and fill it in lilac.
- Draft a new design. Pencil first, then ink.
- Plan a set. Colour four grids with the same palette and see if they look like a family.
Print it more than once. The sheet exists to be scribbled on.
From drawing to beads
When the design is done, check:
- Row counts add up to the total.
- Colour totals are written, with spares.
- Increases and decreases are only at row ends. The Start Here guide shows how to add and drop beads to widen or narrow a row.
- Symmetry: a mirror check. Fold the sheet down the middle if the design is meant to be symmetrical.
Then buy the beads, make the ladder-stitch base from your first row and bead it.
Mistakes to avoid when designing
- Too wide. Over 10 beads wide and the charm becomes a patch. Break it into two.
- Too many colours. The pack's charms use three to five. More makes it hard to read.
- Isolated single beads. A bead surrounded by a different colour is hard to place. Check the row guide.
- Forgetting the hanging loop. The top row needs room for the loop of 5 beads.
A worked example: a tiny cloud
Say you want a cloud. Eight rows is enough. Make the widths 3, 5, 7, 9, 10, 10, 8, 6. Colour the whole body pale blue, add two white beads in rows 3 and 4 as a highlight and a pink bead on each side in row 5 for cheeks. Count: 3 + 5 + 7 + 9 + 10 + 10 + 8 + 6 gives 58 beads, with a handful of white and pink. Write the row guide, fix the colour key, and you have a chart as complete as the ones in the pack. Bead it from the top, and if a row comes out with the wrong count, the guide tells you where to look.
Keep your charts
Save each design with its row guide and colour key. A year from now you will want to make it again, and the chart will tell you what to buy. Name them and file them with the pack's own charts.
When to use ready-made charts instead
Designing is fun, but a ready-made chart saves an evening. The ten in the pack are a good way to learn how shapes are built. Make three, then design your fourth. You will know where to put the eye.
The result
Brick stitch graph paper turns an idea into a counted chart. The pack gives you ten examples and a planning sheet; the rest is your own palette and pencil. The first design you draw and bead yourself is the point at which the hobby becomes yours.