Round Bag Sewing Pattern: A Smooth Curve, Every Time
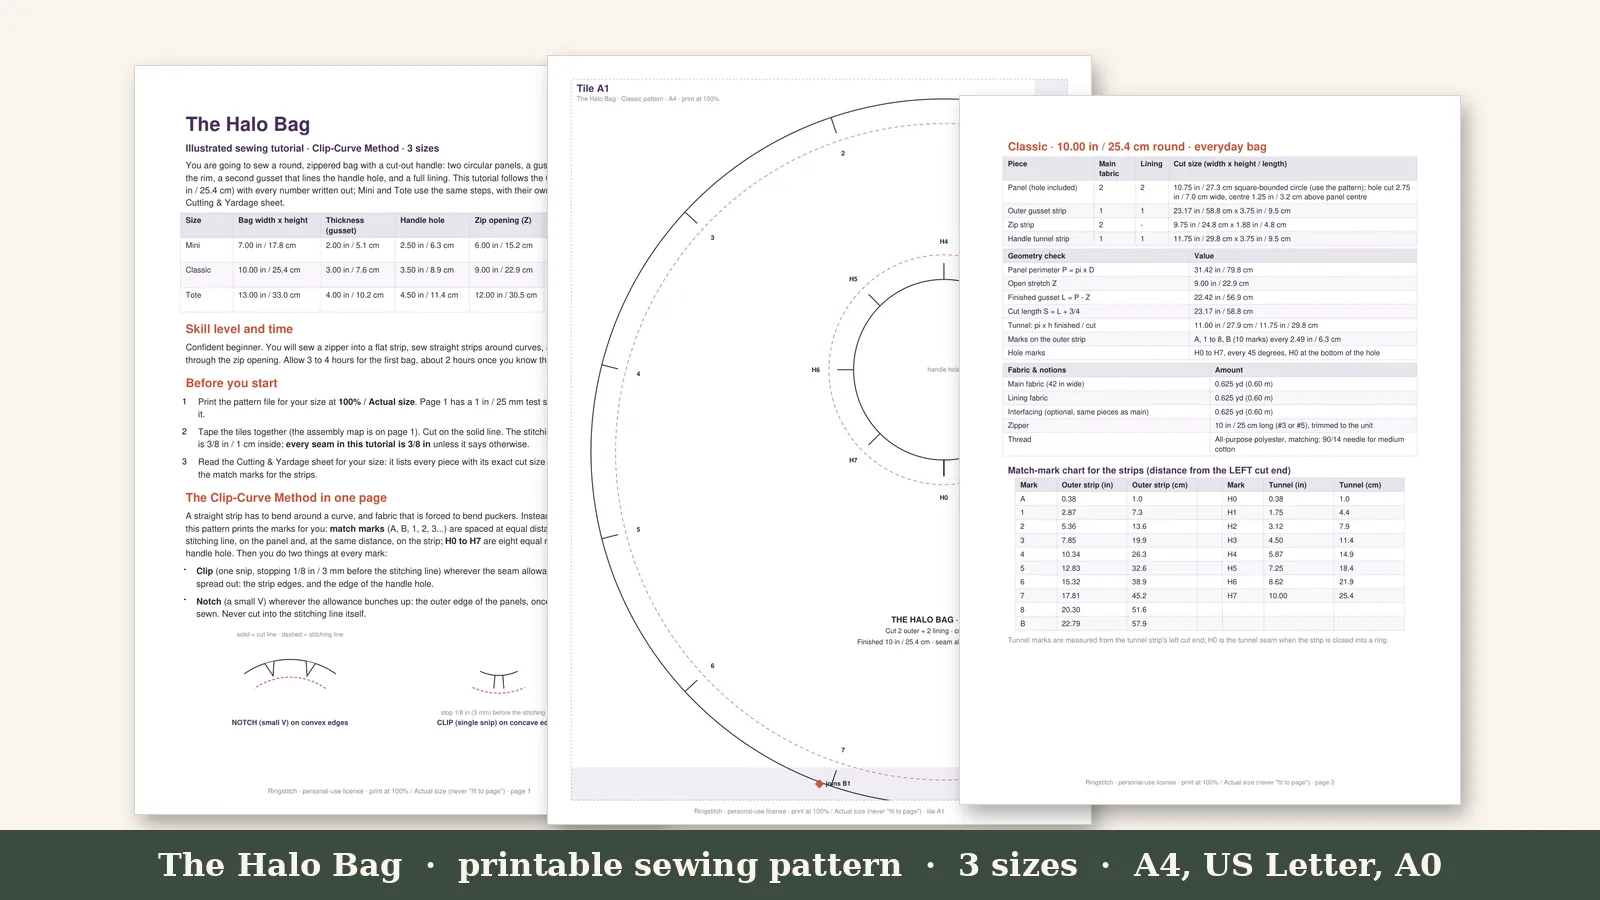
A round bag with a cutout handle looks like something from a boutique shelf, and it is a weekend project once you have a pattern that tells you where to clip. The shape is simple: two circular panels, a handle opening and a lining. What makes people give up is the curve, which ripples when you sew it without a plan. This guide explains what a good round bag sewing pattern should give you, and how Ringstitch · The Halo Bag Sewing Pattern from Ringstitch is built around that.
Why round bags are everywhere, and why patterns are scarce
Search for a round bag and you will find a thousand photos: linen halos, corduroy circles, quilted rounds with a handle sliced out of the top. Now search for something you can print and cut. The results thin out fast. Most of what exists is a photo of a finished bag from a seller who does not share the pattern, or a rough sketch that tells you to "draw a circle."
That gap is the whole reason this pattern exists. A circle is easy to draw. A circle that sews up into a bag that sits round, with a handle opening that does not sag, is a pattern problem: the seam allowance, the notches that line up the panels, the points where the curve needs relief cuts. Those details are what you are paying for when you buy a pattern.
What a good round bag pattern should include
Before you buy any pattern, run it against this short list.
Actual-size pieces with seam allowance included. If you have to add the allowance yourself you will get it wrong on a curve. The pieces should be ready to cut.
Notches on every curve. Notches are small marks on the edge of a piece. On a round bag they tell you where the front panel meets the back panel, where the handle opening starts and stops, and where the lining lines up. Without them you are matching two curves by eye.
Clip marks. This is the detail most patterns skip. When you sew a curved seam and turn it, the fabric on the outside of the curve needs room to spread and the fabric on the inside needs room to compress. Clipping little cuts into the seam allowance gives it that room. Where you clip, and how deep, decides whether the curve lies flat or puckers.
More than one size. A mini bag for a phone and a card, a classic size for the day, and a tote for everything else. One pattern that covers all three means you learn the method once and use it three times.
A tutorial with pictures. Written steps alone are hard to follow on a shape you have never sewn.
What is inside the Halo Bag pattern
The Halo Bag pattern comes with three sizes: Mini, Classic and Tote. Each is drawn at actual size with seam allowance included, so there is nothing to add or convert. The Clip-Curve notch guide is the centerpiece. It shows every notch and clip mark on the pieces and explains the order to use them. An illustrated tutorial walks you from cutting to turning the bag and finishing the handle cutout. A cutting and yardage sheet shows the fabric you need and the layout for each size, so you buy the right amount the first time.
The files come in A4 and US Letter tiled versions, each with join marks and a 1 inch (25 mm) test square. There is also a copy-shop file with the same pattern at large format, for printing on one sheet.
How the project goes
Here is the realistic shape of an afternoon with this kind of pattern.
Print and check scale. Print the tiled file at 100 percent, measure the test square and only then tape the sheets. If the square is off, the whole bag is off. This takes five minutes and saves the afternoon.
Cut the pieces. Cut the outer fabric, the lining and the interfacing if you are using it. Transfer the notches with a tiny snip into the seam allowance or a chalk mark. Keep them visible, because you will use them constantly.
Sew the curve. Match notches first, pin at the notches, then ease between them. Sew slowly. On a curve, a slower speed and a shorter stitch length are both friendlier.
Clip, turn and press. Clip to the marked points, turn the bag right side out, and press the seam from the lining side so the curve sits flat. The first time you turn a clipped seam and see a smooth edge instead of a ripple is the moment the method clicks.
Finish the handle opening. The cutout is the structural part of the bag, so it is the part that needs reinforcement. The tutorial shows how to support and turn it so it does not warp over time.
Who it is for
Confident beginners who have sewn a pouch or a simple tote and want a bag that looks like it came from a shop. Experienced sewists who want a reliable base pattern in three sizes so they can make gifts or stock for a market. And anyone who is tired of looking at the finished photo and wishing there was something to print.
It is not a pattern for hand sewing from scratch with no machine, and it does not teach basic sewing skills like threading a machine. If you can sew a straight seam and press it, you are ready.
Choosing fabric
The pattern works with a range of fabrics, and the cutting and yardage sheet gives you amounts. In general, a medium-weight woven such as canvas, linen blend, corduroy or quilting cotton with interfacing gives a round bag structure. Very thick fabrics make a curve harder to turn, and very thin ones need interfacing to hold the shape. Pick a lining in a contrasting print: the inside is where a bag shows its personality. If you want the full discussion, see our guide to fabrics for bag making.
Add-ons for a more finished bag
If you want a lined bag with interior pockets, or a custom strap with proper hardware, those are available as separate add-ons (sold separately): a Lining and Pockets Add-On and a Straps and Hardware Guide. The core pattern works on its own, with a simple lining and a strap made from fabric or webbing, so you can start without them.
What you walk away with
A bag you made, in a fabric you chose, in a size that suits how you carry things. The curve is smooth. The handle opening holds its shape. And you have a pattern file you can print again for the next one: a mini for a niece, a tote for the farmers market, a classic in the velvet you have been saving.
Ready to see the pages? The pattern, tutorial and cutting sheet are all described in one place, and you can start sewing as soon as you download and print.