Round Tote Bag Pattern: Choose Your Size Before You Cut
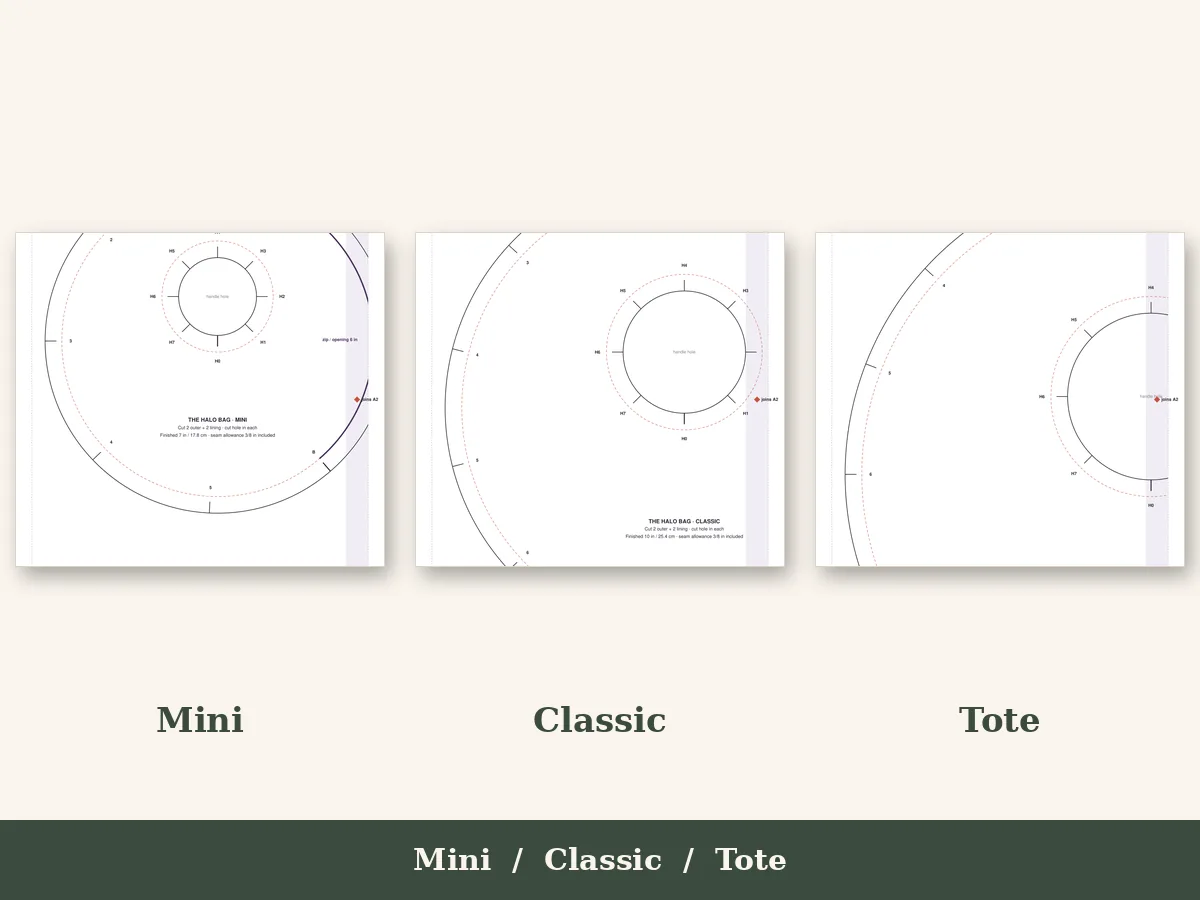
The right round tote is not the biggest one. It is the size that fits how you carry your day. A circle looks the same in a photo at any scale, but on your shoulder a bag that is too big flops and one that is too small gets left at home. That is why the Halo Bag pattern from Ringstitch comes in three sizes in one file: Mini, Classic and Tote. This guide helps you choose, and shows what changes in the sewing as the circle grows.
The three sizes at a glance
| Size | Best for | Carries | Feels like |
|---|---|---|---|
| Mini | Evenings, travel, a gift | Phone, card, lip balm, keys | A small accessory |
| Classic | Everyday | Wallet, phone, keys, sunglasses, a small notebook | The bag you actually reach for |
| Tote | Errands, market, a day out | Books, a light layer, a water bottle, shopping | A statement piece |
Each size is drawn at actual size with the seam allowance included. You do not scale the pieces on a printer or recalculate allowance. You print the size you want and cut.
How to choose
Start with what is in your bag today. Empty it onto a table and sort it into "daily" and "sometimes." If the daily pile fits in your two hands, Classic is the size. If you carry a lot of extras, you want Tote. If most of your day is a phone and a card, the Mini will become your favorite.
Think about the curve of the body too. A round bag sits against your hip or under your arm. A very large circle swings wide when you walk, and on a petite frame the Tote can feel like a wall. A Mini on a long strap is a crossbody. The sample photos on the page show all three side by side so you can judge proportion.
A good rule: if you are making this as a gift, make the Classic. It is the size that suits the most people.
What changes as the circle grows
The curve. On a bigger circle the curve is gentler, so each seam is easier to ease in. The Mini has a tighter curve, so clipping matters more and you want to sew slowly. This is where the Clip-Curve notch guide helps: it marks where to clip on each size, so you are not applying the same clip spacing to a different radius.
The handle opening. The cutout handle scales too. On the Tote it is the main way you carry the bag, so it takes weight and needs reinforcement. On the Mini it is more decorative and you usually add a strap.
The fabric. A bigger circle needs more fabric, and also more structure. Tote bags in lightweight fabric flop. Pair a medium-weight outer with interfacing and the shape stays up. The cutting and yardage sheet gives the amounts and the layout for each size, which matters because a circle placed badly on a piece of fabric wastes a lot.
The time. Plan an afternoon for a Mini or a Classic and a little more for the Tote. None of them is a big project once you have printed and cut.
A plan for making all three
Many people buy a round bag pattern to make one bag and end up making several. If you want to do that deliberately, here is a sensible order.
- Start with the Classic. It teaches the method at a comfortable scale.
- Make a Mini from the offcuts. The Mini needs little fabric, so it is a good use of leftover pieces from the Classic. The tight curve will make you a better clipper.
- Finish with the Tote when you are confident, in the fabric you want to show off.
Three bags with the same pattern, in three sizes, make a good gift set for a mother, a daughter and a friend, or a small stock of bags for a market stall.
Printing three sizes without wasting paper
The tiled A4 and US Letter files print as sheets you tape together. Each has join marks and a 1 inch (25 mm) test square so you can confirm the scale before you cut. If you plan to make the Tote often, the copy-shop file prints the whole pattern at large format on one sheet, so there is nothing to tape. Many copy shops will print it for a small fee, and then you can keep the large sheet rolled up and reuse it.
Fabric guidance by size
For the Mini, a firm quilting cotton with a fusible interfacing is enough. For the Classic, add a medium-weight canvas or a linen blend. For the Tote, choose a heavier canvas, corduroy or a furnishing fabric, with a sturdy interfacing in the panels. The idea is that the bigger the bag, the more structure it needs to stay round. Our guide to fabric for bag making has more detail.
Add-ons
If you want interior pockets and a clean lining, or a custom strap and hardware for the Tote, there are two extras (sold separately): the Lining and Pockets Add-On and the Straps and Hardware Guide. The Tote benefits most from a proper strap, because it carries the most weight.
The choice in one line
Mini if you want a small accent, Classic if you want one bag for everything, Tote if you want to carry your day. You do not have to choose before you buy, because all three come in the same pattern.
Lining a larger bag
The bigger the circle, the more the lining matters. A tote with a loose, floppy lining pulls at the outer fabric and distorts the curve. Cut the lining from the same pattern pieces, taking a hair more seam allowance if you want it to sit snug, and press the lining seams open before you assemble. Choose a lining weight close to the outer: a quilting cotton under a canvas outer is a classic pairing. A contrasting print inside means the bag rewards you each time you open it, and a solid color hides crumbs and pen marks. If you plan to use the bag for daily carry, consider a washable lining so you can refresh it without stressing the outer fabric.
A word about weight
Think of the finished weight. A tote filled with books and a bottle can weigh several pounds, and the handle opening carries all of it. That is why the tote size benefits from a second layer of interfacing around the handle, and from topstitching close to the opening. For heavy daily use, a shoulder strap attached at the sides spreads the load across your shoulder and takes the strain off the cutout. Straps and hardware are covered in a separate guide (sold separately), but a strap from sturdy webbing sewn into the side seams works well too, and the tutorial shows where the stress points are so you can reinforce them in the right places.
Make it yours
A round bag is a blank circle, so personalization is easy. Appliqué or embroider the front panel before assembly, when it is flat and easy to handle. Quilt the panels for a padded look. Add a patch pocket on the outside. Sew a bag from two coordinating fabrics, one for each side. Because the pattern is at actual size, you can lay a piece on your fabric and see exactly where a motif will sit, which makes it simple to center a print or fussy-cut a flower.