How to Sew a Felt Crown for Beginners: Three Stitches Are Enough
Felt is the kindest fabric for a beginner. It does not fray, it does not need ironing, it holds a shape and it forgives uneven stitches. A crown is the kindest felt project, because the seams are short and the result is obviously charming. If you have never sewn, this is a good place to start, and the pattern in Crown & Thimble · Felt Birthday Crown Pattern Kit is designed with that in mind.
The tools you need
You do not need much. A handful of tools covers the whole project.
- Sharp scissors for felt. Dull blades chew the edge.
- Hand-sewing needles with a medium eye.
- Thread in colours to match the felt, or embroidery floss for visible stitches.
- Pins or clips. Small clips (wonder clips) are gentler on thick felt.
- A fabric marker, chalk pencil or sliver of dry soap for tracing.
- Flat elastic for the band.
- A thimble, optional. Felt is thick, and a thimble spares your fingertip.
The felt, thread and elastic are not included in the kit, and the materials list says what to buy.
Three stitches are enough
The running stitch
In, out, in, out, along a line. Keep the stitches the same length, about 3 to 4 mm. Use it for joining pieces where the stitches will be hidden inside, and as a decorative line on the surface.
The whip stitch
Pass the needle around the edge of a piece and through the felt, in a spiral. Use it to attach appliqué pieces to a base, and to close the band. Keep the stitches at an even angle and spacing, and they look like a deliberate edge.
The blanket stitch
A looped stitch that makes a neat edge. It is the most decorative of the three and optional. Use it with embroidery floss on the lower edge of the crown, and it looks professionally finished.
Practise each on a scrap of felt for five minutes before you start. By the time you reach the crown you will have the rhythm.
Starting and finishing a thread
Tie a small knot at the end of the thread, or make two tiny stitches on the spot to anchor it. To finish, make two or three small stitches over the same place, then cut the thread close. For felt, you can hide the knot between the layers, where it will never be seen.
The crown, step by step
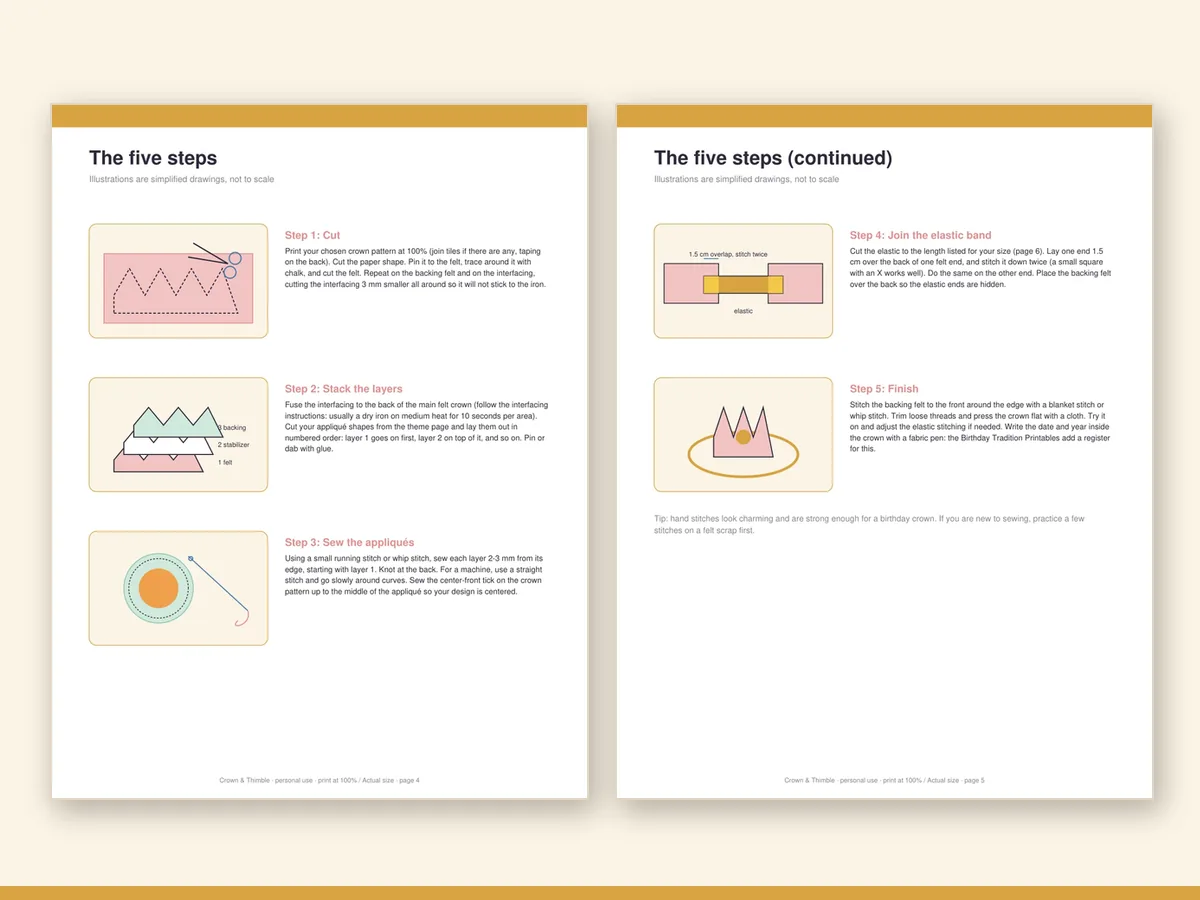
1. Prepare the pieces
Print the pattern, trace the pieces on felt and cut them out. Number the appliqué pieces on the back with a pencil if the felt is light, so you do not mix them up.
2. Appliqué onto the front panel
Pin or clip the first piece to the front panel. Stitch around the edge with a whip stitch or a running stitch, going through both layers. Then add piece 2, piece 3 and so on. Work on the flat panel before you form the crown.
3. Join the front and lining
Place the front and the lining together with the right sides out, and stitch around the top edge with a whip stitch or a blanket stitch. Leave the bottom open to insert the elastic.
4. Form the band and add the elastic
Fold the bottom edge to make a casing, stitch it down, and thread the elastic through. Try the crown on the child's head, adjust, and stitch the elastic ends securely.
5. Finish
Trim any loose threads, and press with a cool iron through a cloth if needed. Felt can melt or shine if the iron is too hot.
Hand or machine
Hand sewing is the more relaxing option and the better for a first project, because you can go slowly, correct mistakes and see what you are doing. A machine is faster, particularly for the long seams, but needs a good needle and a stitch length that suits the thickness of the felt. The assembly guide covers both. If you are nervous, start by hand and change if you like it.
Troubleshooting
- Stitches show on the front. Pull a little less tight, or use a thread colour that matches.
- Points curl. The felt is too soft. Add a lining or a layer of interfacing.
- The elastic twists. Pin it flat before you stitch the ends.
- The thread knots. Use shorter lengths, about the length of your forearm.
Make it your own
Once you know the stitches, add small details: a French knot for an eye, a satin-stitch star, a line of running stitch along the base. Each is easy to learn and each makes the crown look more finished. The choice of themes is in the themes guide.
What a beginner finishes with
A crown that fits, sits straight and looks made with care. More importantly, a new skill. Many people who start with a felt crown go on to make felt ornaments, bags and toys, because they discover that stitching felt is enjoyable.
If you want a more general overview of the project, see the DIY felt birthday crown guide, or the pattern overview.
A practice run that pays off
Before cutting your good felt, make a tiny test piece from scraps: a rectangle of base felt, a small circle on top, and a short strip folded into a casing with a piece of elastic threaded through. Stitch everything with the stitches above. It takes ten minutes and shows you three things: how the felt behaves under the needle, how tight your stitches naturally run, and how the elastic casing closes. Most beginners find that their first stitches are tight and their tenth are perfect. Better to learn that on scrap.
Posture, light and pace
Hand sewing is easier when you are comfortable. Sit near a window or under a lamp, rest the work on a table or your lap, and take a break every half hour. Felt is thick, so pull the needle through with the pads of your fingers rather than gripping. If your fingers ache, a thimble or a bit of masking tape on the pushing finger solves it. Keep a small pot or dish for pins so they do not vanish into the sofa.
How to read the pattern pages
Each pattern page has the shape, the label of the size, the grain or fold marks if any, and the 2 in / 5 cm square. The appliqué pages add numbers. Read the guide once through before you start, look at the pictures, and then follow it step by step with the felt beside you. If a step is unclear, the illustration beside it is the answer.