First Birthday Crown Pattern: A Soft Felt Crown for Baby
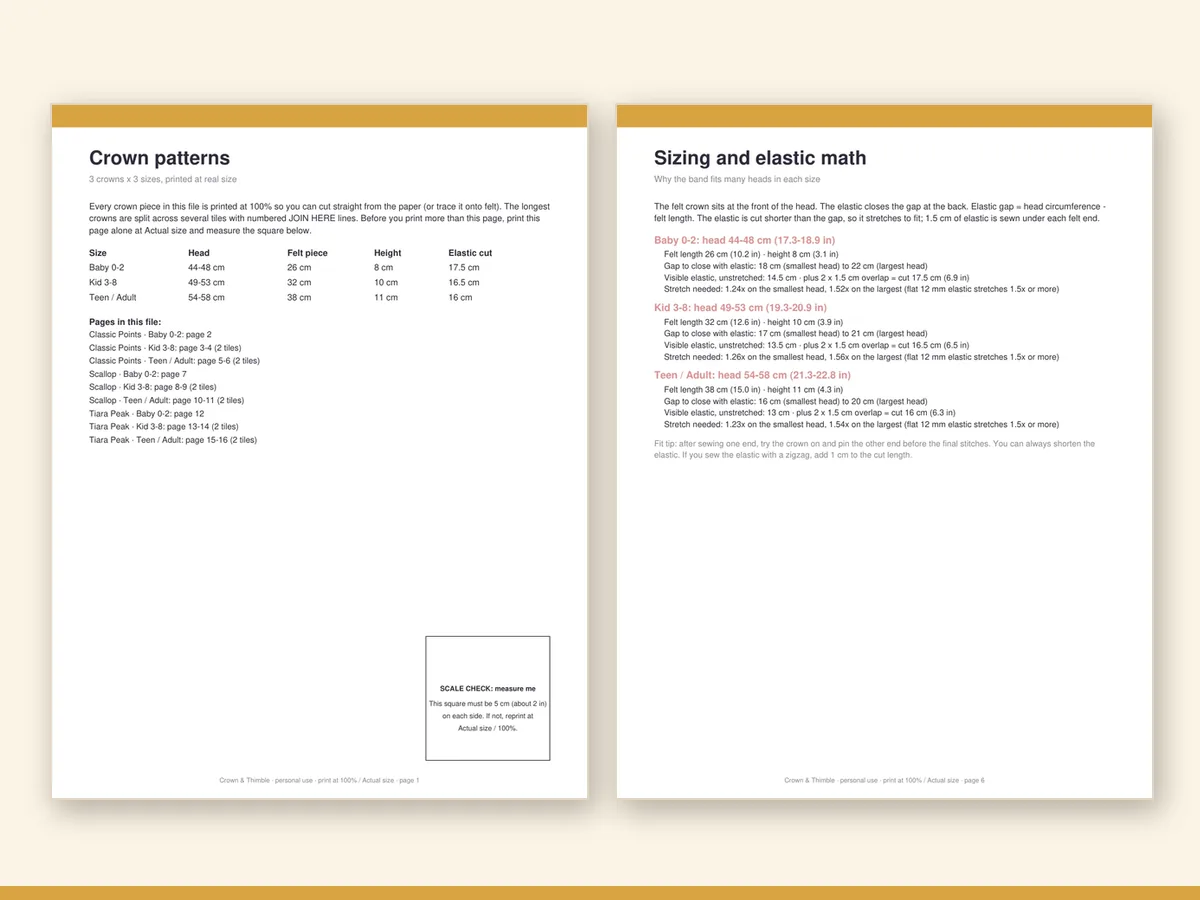
The first birthday is the one with the most photographs and the fewest memories, at least for the person wearing the crown. That is exactly why a handmade crown is worth the effort. It becomes the object that links the day to everyone who remembers it, and it stays in a box long after the cake has gone. This guide covers how to make a good one with the Baby size in Crown & Thimble · Felt Birthday Crown Pattern Kit.
What changes for a baby crown
A baby crown is not just a small child crown. A few things are different.
The head is small and round. A 12-month-old's head is usually in the 44-48 cm (17-19 in) range, and the proportion of forehead to crown is different from an older child. The Baby pattern lowers the height of the shapes and shortens the band so the crown does not tower.
Comfort matters more than drama. A baby cannot tell you the crown is scratchy. Rounded edges, a soft lining and flat, wide elastic are the safe choices.
It will be worn for a short time. Photos, cake, a family moment. That frees you to choose the prettiest design rather than the most durable one, though the construction should still be sound.
It will probably end up in the food. Felt can't be washed like a bib. Spot cleaning is the only option, so choose a colour that will forgive a smear of frosting.
The shapes that suit a one-year-old
Of the three crown shapes in the kit, two suit babies best.
- Scallop. Rounded peaks, no points. This is the one to choose if you have any doubt.
- Classic Points. A familiar crown silhouette at a low height. Good for a boy who needs a "king" look, with the points slightly rounded at the tips when you cut.
Tiara Peak is more at home on a three-year-old who will insist on the tall centre. You will have time for that later.
Number one, or a theme?
Many parents want the number 1 in the middle, and it works. A single felt "1" in gold or white on a rainbow or sea-blue crown is a classic image. If you want a more playful look, choose a theme. The kit has four ready to use:
- Rainbow: the safest choice, and a lovely match for a smash-cake photo.
- Little Dino: for the boy who is already pointing at everything.
- Wildflower: soft and gentle, best on cream or pale green felt.
- Under the Sea: fish, waves and shells for a summer birthday.
If you want to see them in more detail, the themes guide walks through each one.
Step by step, in an easy afternoon
- Measure. Wrap a tape around your baby's head above the eyebrows. If the number is between 44 and 48 cm (17-19 in), the Baby size is right.
- Print. Print the pattern at 100 percent and check the 2 in / 5 cm square on the check page.
- Trace and cut. Cut the front panel twice (once for the front, once for the lining) and the appliqué pieces from small offcuts.
- Appliqué. Follow the numbers. For a baby crown, use fewer layers than you would for an older child so that the surface stays light.
- Assemble. Stitch front and lining together, leave the bottom edge open to insert the band, and thread the elastic through the casing.
- Fit. Try it on the baby's head, pull the elastic to a snug but not tight fit, and stitch it closed.
The Start Here guide is illustrated at every stage, so you can hold your phone or a printout next to the felt as you go.
Materials for a baby crown
- A sheet of soft felt. A wool blend is nicer against the skin than rigid acrylic felt.
- A few offcuts for the details.
- Soft, flat elastic, 6 to 10 mm wide.
- Thread to match.
The felt, thread and elastic are not included in the kit; the materials list says how much to buy.
Making the day around the crown
The crown is also a signal: it tells the room whose day it is. Some parents put it on only for the cake. Some use it all morning. Some hang it above the high chair from a ribbon as a decoration. Whatever you choose, take the photo before the cake. Even the sweetest baby will have frosting in the felt in minutes.
Keep it, and plan the next one
A felt crown folds flat and survives well in a box with tissue paper. Many families keep the first crown and make a new one each year, a little bigger and a little more "of the child's choosing". That is how a tradition begins. If you like the idea, see the birthday tradition guide for what to put in the box alongside the crown.
When you are ready for the next size, the kid crown pattern guide covers ages 3 to 8, and the full pattern overview lists all the shapes.
The short version
For a one-year-old, you need the Baby size, a rounded shape, a soft lining and a flat elastic band. Crown & Thimble · Felt Birthday Crown Pattern Kit has all four, at actual size, in A4 and US Letter.
Small decisions that make the photographs better
The crown only has to look good for a few minutes, so think about the camera. A matte felt in a solid colour photographs better than a glittery one, because it does not catch the flash. Choose a crown colour that contrasts with the background: gold on a cream highchair tray disappears, but dusty blue or sage green stands out. Keep any appliqué on the front central, because a baby's head turns and a centred design stays in frame. And do a practice fitting a day or two ahead, so you are not adjusting elastic at the moment the cake appears.
If the baby hates it
Some babies reject anything on their heads. A good plan is to have the crown on the table at breakfast for a few days, so it becomes familiar. On the day, put it on for the photograph, not before, and let them hold it. A crown held in two small hands and chewed slightly is a perfectly good photograph too, and you will remember it more fondly than a forced one. Because the pattern is yours, you can also make a second crown in the same shape for a doll or a favourite toy, so the baby sees the same crown on someone else first.