Felt Crown Pattern for Kids: Fit, Comfort and Themes They Love
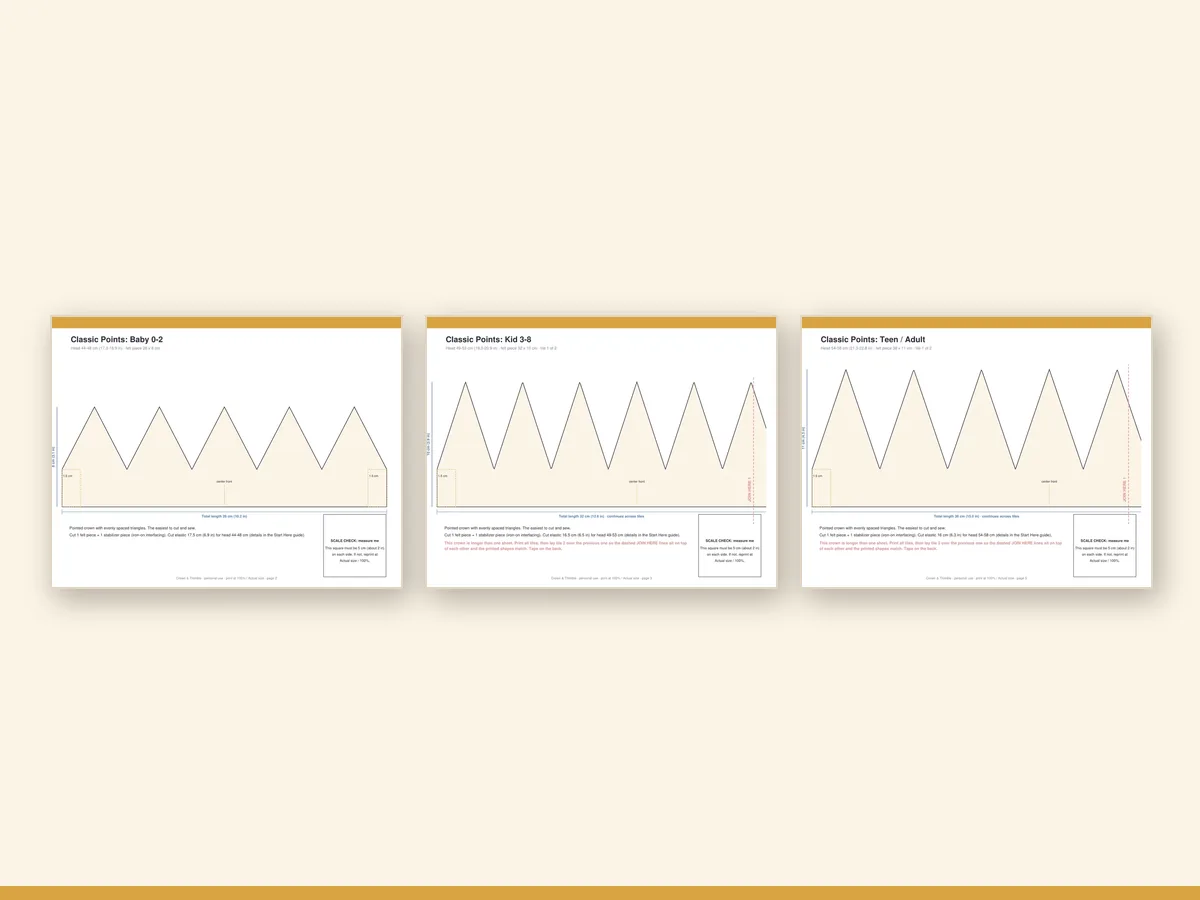
A crown made for a child has to survive being worn, sat on, taken off, put on upside down and worn to bed. That changes the design brief. Looks matter, but fit and comfort come first, and the crown has to be easy to adjust when a child's head, hair or mood changes. This guide covers how the kid-size patterns in Crown & Thimble · Felt Birthday Crown Pattern Kit are built to take that kind of use.
Fit first: three sizes for three stages
Children's heads grow quickly in the early years and slowly afterwards, so a single "child size" is a compromise that fits nobody well. The kit uses three:
| Size | Typical age | Head circumference |
|---|---|---|
| Baby | 0-2 | 44-48 cm / 17-19 in |
| Kid | 3-8 | 49-53 cm / 19-21 in |
| Teen/Adult | older | 54-58 cm / 21-23 in |
The Kid size covers the biggest span of years, which is where an adjustable elastic band really matters. A five-year-old and a seven-year-old are different heads, but the same crown can take either with a quick tuck of the elastic.
To measure, wrap a soft tape around the forehead above the eyebrows and over the widest part of the back of the head. Add nothing: the elastic provides the room. If you are between sizes, take the larger one and tighten the band.
Why elastic beats a tied ribbon or a stiff band
Many homemade crowns close with a Velcro tab or a ribbon. They are fine, but they have drawbacks for children: Velcro scratches hair and clicks open in a tug of war, and a ribbon becomes a knot you cannot undo. A flat elastic band hidden in a casing at the back adjusts without a fastener. It stretches with the child's movement and goes on and off over the head without pulling the felt.
The assembly guide shows how to cut and join the band so the join sits at the back and the casing stays flat. Use soft, flat elastic about 6 to 10 mm wide. Round cord elastic digs in.
Pick a shape that suits the child
Classic Points is the all-rounder and photographs well from any angle. It is the right choice for a child who wants a "proper" crown.
Scallop has no sharp ends, so it suits very small children, children who dislike anything pointy near their face, and any theme with soft curves such as Rainbow or Wildflower.
Tiara Peak has the tallest point in the middle, which gives it a dressed-up feel. Children from about five tend to ask for it, because it looks like a "real" princess or king crown.
Pick a theme the child recognises
A child wears a crown more willingly if it carries a picture she chose. The four included themes were chosen to cover the most common asks:
- Rainbow: a bright stacked arc with a cloud. Works for every child.
- Little Dino: a friendly dinosaur with spots. The crown most often asked for by boys, though many girls will pick it too.
- Wildflower: a small bouquet of layered petals. Soft and slightly vintage.
- Under the Sea: a fish and shells with wavy details. Excellent for pool parties.
Let the child choose from pictures of the four and she will wear it as her own. You can see all four in the themes guide, and the later expansion of eight more is sold separately if one of the four is not right.
Make it durable
A crown for a child will be worn with more energy than one for a photo shoot. A few construction choices make a difference.
- Double the felt. Cutting the front and a lining makes the crown firmer and also hides the back of the stitches.
- Anchor the appliqué. Sew around every edge of every layer, not just the top one. A single missing stitch is where a child's finger starts to peel.
- Skip small hard decorations. Buttons, beads and sequins can come loose. Felt shapes, embroidery floss and flat ribbon do not.
- Reinforce the band join. Stitch the elastic casing twice at the back where it takes the most stress.
Hand stitching with a child nearby
A crown takes an afternoon, and an afternoon with a child is not always quiet. Plan stages that can be done in short bursts:
- Let the child watch you trace and cut. They will want to touch the colours.
- Give them the appliqué pieces to arrange on the front, following the numbers. It becomes a small puzzle, and they get to say "that's mine".
- Do the stitching while they are busy, and take the finished front back for a try-on before you assemble the band.
This approach also works for a class activity where each child places their own pieces before the teacher stitches them.
Wearing and storing
Felt is not washable in the way fabric is. Spot clean with a damp cloth. If the crown is going to be worn often, a light mist of fabric protector before the first wear helps keep it clean. Store flat in a box with tissue paper, because a crown crushed in a toy box will lose its points.
Starting a collection
One advantage of a repeatable pattern is that you can make a new crown every year in the next size up, as a visible record of the child growing. Over the years, the line of crowns in the cupboard becomes a family object. For ideas on turning that into a ritual, see birthday tradition ideas for kids.
If you are starting with a baby, read the first birthday crown pattern guide, which handles the Baby size in more detail.
In short
Crown & Thimble · Felt Birthday Crown Pattern Kit gives you three crown shapes, three sizes with an adjustable band and four themes, all printed at actual size in A4 and US Letter. The supplies are not included. If you can thread a needle and follow numbers, you can make a crown a child will keep.
Common questions parents ask at the fitting
"Why does it slide forward?" The band is too high on the forehead or too loose at the back. Move it to sit just above the eyebrows, and tighten the elastic by a centimetre.
"Why does it feel stiff?" Some craft felt is very firm. Wool-blend felt softens a little with handling, and a lining in a softer felt makes the inside more comfortable.
"Can she wear it to school?" Yes, but it is lighter if you skip heavy decoration. A thin crown with a single appliqué is easy to carry and hard to damage.